How to Install Shower Panels
This entry was posted on Jan 17, 2014 by speedy-bedWhether your fitting a new shower enclosure, or updating your current one using decorative pvc panels can make a real statement. They are much easier to install especially for DIY’ers than ceramic tiles, and using panels such as Geo-panels is becoming the choice of most professionals, especially when working on large scale jobs, as the fitting of these panels takes far less time than traditional tiling. Once fitted they provide a waterproof, mould free and easy to clean surface that on a big scale such as hotels, will save you so much time on the cleaning schedule.
As there’s mainly just one joint in each corner of your shower enclosure, and as the larger wall panels are 1mtr wide x 2.4mtr high, even if you do experience a leak, it should be very easy to resolve, whereas with tiles, the faulty grout could be in any one of a number of places, and be almost impossible to find. Using these larger wall panels means that your shower area can be covered in just two panels at right angles to each other with just one jointing bead, then the edges of each board can be finished off with an edge trim, or corner strip, so no need for any unsightly silicone on the edges either! It’s also possible to place these panels directly over your existing tiles with a suitable panel adhesive.
Fitting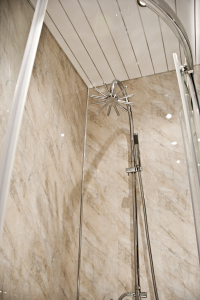
Fitting these panels should be started with leaving them for an hour or so in the shower room to allow them to acclimatise to the temperature of what is usually a hot, humid room. This will help to minimise movement after fitting is complete. Before fitting the panels directly onto existing tiles, you must ensure that the tile surfaces you are fitting them to are clean and flat. Once you’ve checked and cut the panels to size place an end trim at one end of the shower then using a suitable adhesive on the back of the panel, place the panel into position pressing it firmly against the wall so that the adhesive makes a good contact with the surface below. Then place your corner/joint trim into position ready to then do the same with the next panel, usually at approximately ninety degrees. You can then finish off the other horizontal end of the panel with another end trim making sure that you seal all trims and joints with a bead of suitable sanitary sealant.
For a more detailed fixing guide take a look at the manufacturer’s recommendations by clicking on the Green box on the right hand side of our Home page and for further information on how to install shower panels, please do not hesitate to contact Speedy Plastics and Resins on local number (0844) 8586670, and our team will be delighted to help.

