DIY Tips: How to Use Resin Fixings
This entry was posted on Mar 5, 2014 by speedy-bedWhen it comes to fixing concrete walls and repairing damaged masonry, resin fixings can be the best solution for your needs. Unlike other types of fixings, there is no expansion force from resin fixings and therefore you don’t need to worry about increasing the damage.
This lack of expansion also allows you to position the resin very close to the edge and bond directly to the surface of the building. Here’s everything you need to know about how to use resin fixings:
What do I need?
There are four basic items you need to carry out resin fixings, these are:
1. Stainless steel studs
2. Polyester resin
3. Resin gun applicator
4. A drill
All of these can be easily found online or in your local hardware shop. Having the right resin for your needs is the most important part here. The most common type of resin is the polyester based and sets in a very hard seal. It is important to note that resin can be used in a wide range of different applications including masonry, bricks, concrete and even natural stonework. [Image Source]
How to apply resin fixings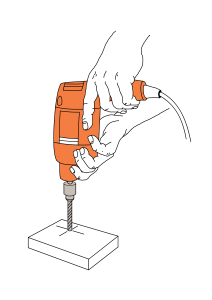
Step One: The first thing you need to do is work out where you need the fixings to be and mark this off. Next you need to drill a hole with care, ensuring that it is deep enough without drilling through. If you’re applying the fixing to a cavity wall then you will need to use a resin sleeve that allows you to plug up the hole.
Step Two: Next you want to inset the stainless steel stud in order to keep the alignment precise while you drill the remaining holes. After all the holes are drilled you need to remove all the dust and loose material from the holes and surrounding area.
Step Three: Before you start with the resin, make sure that everything is close to hand as you need to be quick. Once everything is lined up you want to inject the resin directly into the holes, taking care not to overfill it – roughly ¾ of the hole should be filled. Once you’ve filled the hole you want to push the stud into the hole, giving it a couple of turns in order to break up any bubbles and ensure that the resin is pushing into any voids.
Step Four: Once all the studs are in you need to ensure that each thread has an even covering of resin – add more if this is not the case. Then you will need to leave the studs to cure, the time this takes depends on the temperature and type of resin you used. Don’t put any strain on the studs until the resin has fully set.
Step Five: After the resin has set, you can then put the loadings on the studs and tighten all the nuts to secure it. If any of the studs are too long then carefully cut them down to size and then tighten the nuts on again.
That’s all there is to it, from start to finish this should only take a couple of hours with the longest point being waiting for the resin to cure.

